Having some R&R on the skinny boat that has water under it.
Monday, 31 May 2010
Tuesday, 25 May 2010
Work On The Back End
After a couple of days of prepping the starboard side I was able to coat it with acid etch. That done I set to on the back end.
The first job was to shape up the back end. I had deliberately left these long. There will be a gas box either side so it has been cut to allow for the installation of these. I have cut the sheet for these and they are off to the press shop tomorrow. They will be rolled to follow the size of the bottle. I tried to do this myself but I was unable with the tools I have. It need some heavier kit. Both cutting the sheet for the gas lockers and shaping the rear was done with the plasma cutter. I am getting pretty good with it now.

Next I cut the hole that will be the rear hatch. I have cut it wider than the original door hole as I am not following their door installation method.

Tomorrows job is to thicken the edges as I did on the front.
Thursday, 20 May 2010
More Window Holes Cut Out
I cut the hole for the starboard windows today all without injuring myself :-) SWIMBO was pleased.

Its looking huge now there's some light coming in. The windows also give it some scale.
I can now get on with coating the floor with bituminous paint. The first bit I did was less than pleasant with the fumes.
I have ordered the steel to make the gas lockers today. The price of steel is getting stupid. It's just going up and up. I was told by the stock holders its gone up 40% since January to around £750 a tonne, and there are more rises coming up. Fortunately I don't have much more to buy.
Wednesday, 19 May 2010
Safety First Then Some Primer (Oh! and our 20th Anniversary)
Following my recent attempts to lose weight by angle grinding bits of my knee away, I have been nagged by SWIMBO to wear protection. Of course I have it all, a small selection is featured below, but we all know it's not the manly thing to do. (Manly read sensible).


I can't move, see, breath. or hear but I am protected. Perhaps that's how it works. SWIMBO is happy.

Later some primer has been applied
This was after another 4 hours of preparation involving grinding down more welds and shaping up the the front 8' of gunwale seam. Then a coat of vactan after a final DA"ing".
Tuesday, 18 May 2010
Cut Out The Window Holes
Yesterday afternoon I started cutting the holes for the windows to the port side. I finished today. I had to wait to get some more tips for the plasma cutter. I got them early this afternoon so it was full steam ahead again.

This is the wooden template I made. The nozzel of the plasma cutter makes up the additional 15mm all round that is needed for the finished size. It simply a case of keeping it square to the template. I have found the plasma cutter cuts cleaner when it is moved faster. The temptation is to go slowly as if welding. My machine will cut about 1/2 inch a second. I am getting better at it.

Hole

Shiny window frame

The front of the boat curves in and up. Initially I set the window square as it seemed to be the right thing to do. However once the window was in it looked wrong, so I had to weld a bit in the bottom and grind out the top. Only about 10mm at the front so it is now in slightly colckwise. Now it looks right.
I managed to angle grind my knee again today. Not enough to require a visit to A&E this time though.

Top left is the one that needed stitches 2 weeks ago, the others are fresh this afternoon.
Thursday, 13 May 2010
Thickeng Up The Edges
I am not sure where the idea comes from to thicken the edges of a narrowboat. Some manufacturers do it some don't Personally I like it. It gives a solid look to the boat. So I did my front today.

This is how it started. Thin! (5mm)

Additional part made and spacers inserted

The finished job. Thick (13mm)

Top & both sides done
This all took a lot longer than I would have imagined, but I'm pleased I took my time and got a nice finish ready for painting tomorrow.
Wednesday, 12 May 2010
Finally Got Something To Blog
I have been busy on the boat, honest! but its all been boring but essential stuff like griding and more grinding and yet more grinding, even managing to grind a lump out of my leg requiring a A&E visit for some stitches :-(
The grinding was then followed by some sanding then some more....... you get the picture.
Anyway today I was able to paint the roof. I started with a quick rub over with some wire wool to loosen the powder rust that had formed overnight, then a spirit wipe, then a coat of vactan type coating. I say "type" as my paint supplier have their own version but vactan is the "Sellotape" or "Hover" of the product.

Goes on white turns green the goes black when dry

Dry and re-coatable in about 2 hours

A few hours later I had 2 coats (10L) of zinc phosphate on
While I was painting the roof, my order of blacking came. That was mid afternoon so it was on with the rubber gloves and down to coating the internal base. 1 x 5L tin was enough to put on a thick coat to half the base. I have chosen gloss finish just because I like shiny over matt thats all. BTW it is rather smelly!

Blogger has again distorted the image
Tuesday, 4 May 2010
Getting Ready For Cutting The Window Holes
The ambulance has gone off to the body shop for its spray job so its back on the the boat now. The next job is to cut the window holes.
I am going to use my new toy the plasma cutter :-) I have made a template from ply wood which is 15mm smaller then the window hole.

The template
The reason it's 15mm smaller all round is because the plasma nozzel center is 15mm away from the side of the nozzle body which will be run round the outside if the template.

To be sure its all going to work I cut a test hole in a sheet of thin steel.


That worked a treat.
Generator Running
I have now got the generator engine to run. Its a 2 cylinder Mitsubishi diesel of about 10hp. The problem I had was the control panel had been unwired to aid removal but no note of where they went was kept. This was not a problem as I was sure the Vetus data sheet would cover this. Indeed it did, however it was in every European language except English!

The back of the control panel
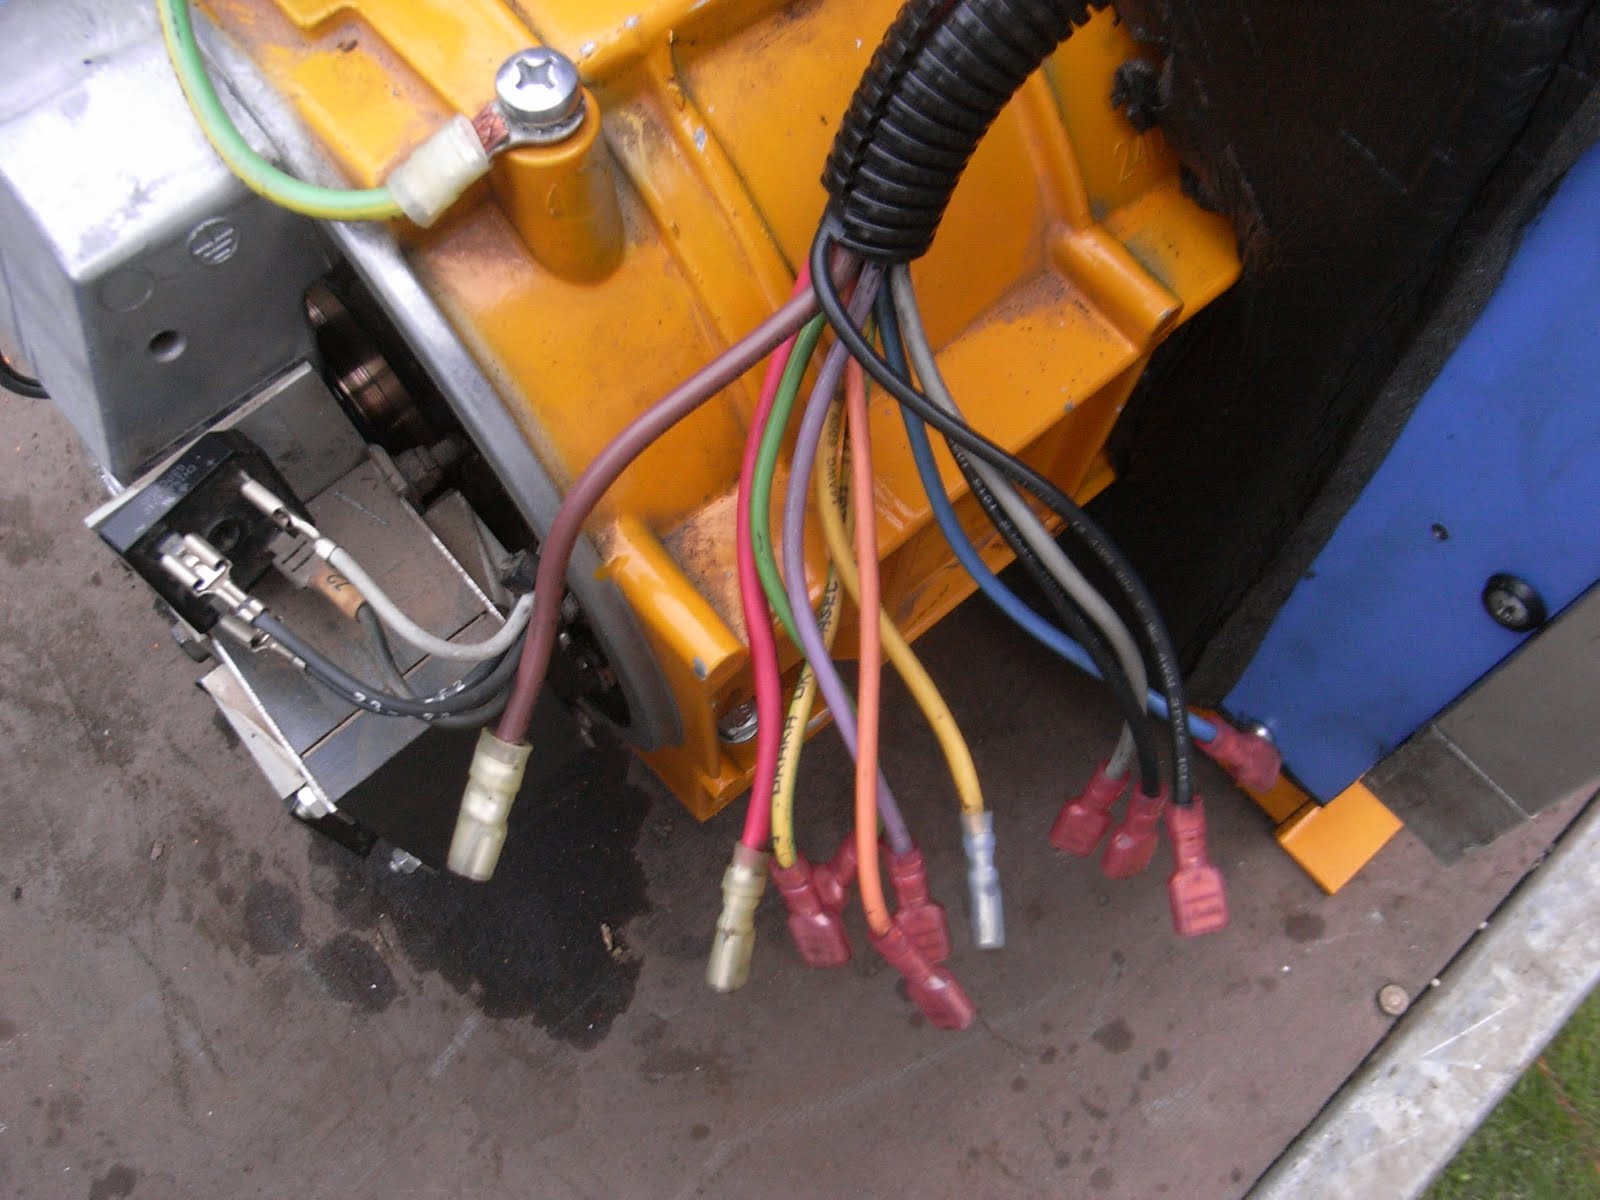
12 wires needing a home
The problem was eventually solved by Ian Bagnall at Vetus UK head office. He very kindly tracked down the right information and emailed it to me in under a day. Many thanks Ian.
Having rewired the panel, fixing up a temporary fuel supply and return, connecting a battery, and shoving a hose up the water intake tube, a few bouts of cranking and the engine fired into life.
Now all I am waiting for is a chap to come and look at the alternator end. Hopefully this will be next week. I already have a price for a complete new unit so I know the worst case cost.
Subscribe to:
Posts (Atom)

