Wednesday, 2 January 2013

Toilet Talk

It's a fact, when a group of boaters get together it's not long before the talk turns to one of several subjects and pretty much every time toilets will crop up.

Another topic is voltage drop, cable thickness, etc.  Well this bog blog post covers both.

It was my intention to have all essential services on the boat running on 12v.  These I figured were water pump, lights, central heating and toilet.  

Since being on the water we have had problems with the toilet back flowing into the bowl about 1 in 5 times this of course is more noticeable on "longer" visits.  Initially I thought it was the non return valve being faulty or damaged, but having serviced this and the macerator unit the problem still existed.  

As winter drew on I noticed that when the toilet flushed the lights would dim significantly on the initial start start of the flush cycle.  As the batteries are working harder this time of year the charge will drop to 80% overnight with the fridge freezer running.  It was noticeable that when I am on the boat alone the problem was less frequent as I don't bother with the fridge for a couple of days at a time which keeps the batteries up to 90+% overnight.  Also it eventually became apparent the problem was worse in the mornings where the batteries are at their lowest, so my thoughts turned to the performance of the macerator and in particular with all the clues the likely cause being voltage drop.

I tested the voltage after a good charge. At the main 12v distribution board 12.83v, which showed 12.37v at the toilet no load.  On start up the voltage dropped to 8.5v rising to 10.5v for the rest of the flush.  This was a water only test and of course would take less power to macerate than a "full" load.  This combined with the run being about 2/3 of the maximum recommended put the system under great strain.

Clearly this was less than ideal although I had used wire gauge theoretically ample to cope with the run distance and load.  My next idea was to run another wire of the same gauge which I did as a temporary.  This had very little effect, improving voltage by about .5v.  I then connected a well charged battery right next to the toilet with a cable run of the same gauge but only about 600mm long.  This proved highly successful with over to 12v being delivered right from the start of the cycle.

I was faced with 2 options, run a massive pair of cables to the toilet which would cause problems because I didn't have room for them without some major carpentry or abandon my original remit and use 230v for the toilet.  The latter choice won out.  OK, I know we are reliant on the inverter being on to flush the loo and if this went west we couldn't flush but in reality if the inverter packed up we still have the generator.  I have further made future emergency provision by using a standard 3pin plug and socket so I can if necessary connect a small inverter to the original 12v supply and simply plug it in to there.

The fitting of the new 230v toilet has necessitated some butchery of my original neat installation.

This is what it looked like from behind before, 3 nice neat holes through the wall.


This is what it looks like now. Power was easily available from the sockets that supply the AV equipment.

Not quite so neat but effective

And with the new toilet all fitted.  No sight of the hole now.


Initial tests are encouraging!  Certainly the flush is much more powerful.  The flush is now by a button on the side of the toilet which is not what I expected from the details.  I still have the 12v toilet panel just visible at the top of the photo.  I'm going to see if this can be connected to the control in the toilet as its more convenient and I won't have to devise a cover for the panel & hole.

Once I'm happy with it all I will bolt it down securely although as it is it's pretty stable and usable.


Sunday, 2 December 2012

More Ballast & Winterising

As we carry over 2000L of water in the bow tank the trim of the boat is affected between full and nearly empty.

In order to minimise this I decided to put some ballast in the water tank.  As my brother owns a stone worktop company Granite Unlimited he gets plenty of cut outs from the sinks and hobs.  The beauty of natural stone is it's free for me, very heavy 30mm is 90kg per Sq/m and its totally unaffected by water.

 This small amount is 750kg worth

Now it's in the water tank the leverage being right at the front of the boat has brought it down nicely.  It has displaced about 175L of water so the net effect on a full tank is about 500kg of extra weight and on an low tank nearer 750kg.  It's true we have lost some capacity but is not going to be a problem as I see it because we will simply have to fill up that bit sooner which in turn will mean a more frequent refreshment of new water. The stone is nearly 3000kg a cu/m whereas water is 1000kg


 In the water tank

Since being on the water we have filled no more than 4 times from taps along the river, and the tank was freshly painted when we launched.  So where has all this come from?

 New 5 micron filter on the left

The one removed after around 8000l

Hmm! makes you think.  We also have the 0.5 micron drinking water filter for next to pure drinking water.

While I had the tank empty I moved the stop cock to be right on the copper exit stub from the tank.  I feel a lot happier about that. It was close before but was in a plasticc pipe run.

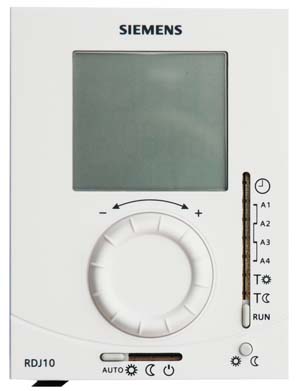
All this was done mid week while on the boat myself.  We have a rule when we are both on the boat.  I mustn't do any work.  I did however slip a couple of winterising jobs past SWMBO.  I installed a frost stat.  It's actually the original CH controller that came with the Mikuni.  I opted to use the RF or remote version as we can move it around the boat depending on where we want to control the heat more fully, i.e. bedroom or lounge.


I have wired it in parallel so it will trigger if the temperature drops below 5c.  The remote unit which looks exactly the same requires 240v at the receiver end so won't trigger when the inverter is off.  This additional one is battery powered.

The other little job sneaked by was draining out enough water form the generator to top it up with antifreeze.  I never knew if it had any in as I acquired it used so to be sure I have put my own in.


Wednesday, 21 November 2012

The Nice Thing About Having A Boat Is:-

There is always something to do.  Always a problem to be solved, or a combining of my interests.

I arrived at the boat yesterday afternoon armed with necessary tools to sort out the grotty and dismal array of plants and mostly weeds on our mooring.  This is supposed to be done by the Environment agency who we rent from but there doesn't seem to be a schedule of maintenance but strangely there is a schedule of Direct Debits.  Anyway before I got on with the stuff I like I decided it was best to get this done and out of the way as the weather was reasonable and the forecast was poor.


About 2 hours saw the job done and all the dead nettles, thistles and sapling Elderberry trees were dispatched.  Hopefully this will allow some grass to grow.

I have been playing with  streaming CCTV for a while now and having bought a new Webcam decided I needed to run some new consealed wires to get the signal back to the laptop in the lounge and then out though the router to the interweb.  Knowing the limt for USB is 5m I saw an adaptor that extends USB over cat5e.  On my last visit to the boat I duly installed a length of cat5e cable in the bedroom ceiling down behind the wardrobes, under the bathroom cabinets and into the lounge drilling necessary holes as I went along all of which are out of general sight. All of this took several hours.

Once this was done I powered up the Webcam only to find for whatever reason that it would only send a 174 x 122 image not the 1280 x 1024 it was bought for.  A bit of digging on the canal forum as there are lots of very cleaver people there with a combined mass of knowledge on all subjects lead me to order a 15m powered USB cable.  Prior to installing the cable I tested it and all was good. 

How pleased was I that when I put the cat5e in the ceiling void I decided to put in an additional trace wire. The result was the new UBB cable was fitted in about 20 minutes.

The intention is to stream live video from the boat as we cruise along, or sometimes if we are just sat mooring.  This can be seen at the Vaughn site.  If you go over there you can become a follower and you will get an email when the camera goes live.  All of this is free and there's currently no adverts on the video feed.

Next up was to run some more cat5e (2 lots) so I can run the bedroom TV on an HDMI extender as this too has a 5m limit and get HD TV in the bedroom rather than just what comes down the coax feed.  While I had the carpet up to hide the cables I sorted out the creaky floor that has been anoying me on my seemingly evermore frequent visits to the loo at night.

This morning it was time to service the generator.  It has reached 2400 hours and the oil was looking decidedly black.  With the oil and filter changed and the diesel filter checked for water (none) and changed it was the turn of the impeller.  This as you can see was definitely in need of changing.


The fan belt was checked for wear and adjustment and both were found to be fine.

A while back I moved the Inverter to under the stairs See Here.  And having sorted out the charging so the charger works much harder it then got really hot which caused it to reduce its output so it remaind happy. Result back to square one after a while of running. See you solve one problem and another problem arises!  The only thing to do is to put some extraction fans in to dump the heat.  The easiest way to power these is from the inverters own fan power supply, that way they would only be on as required.  So this meant taking the inverter out again to gain access to the fan wiring.  I took no chances this time.  I photographed the wiring just to remind me not to wire it up wrong.


The fan on the Victron is 24v so I got 2 x 12v 5" fans and wired them in series, drilled 2 x 5" holes in the stair sides just next the the inverter, put in some wiring with an in line connector and hey presto it all worked.


I just need to get some nice covers for the outside of the stairs.


It's not too much of a problem as its very difficult to see them.  They are not in general sight.

The inverter now runs cold to the touch and is once again outputting maximum charge.


Saturday, 17 November 2012

A Little Update


So what have I been up to in the last month?

Well during the half term holidays we took our selves off to Cambridge and stayed a few days on Midsummer Common.  While there we met up with fellow bloggers Brian & Diana of Harnser.  Not being backward in coming forward and know their plans to visit "The Backs" I blagged a ride for me and Deb.  This is a very rare treat as the lock Jesus Lock is closed to access for much of the year, and our boat is too big to get through.

I did a little time lapse of the trip.


Again this is a first cut of the video and when I learn how to drive the video software I will enhance it a bit more.  This is Harnser's blog of the trip.

On the boat I have been fiddling with stuff.  I had been suffering with charging problems when using the generator.  The problem was that I was only able to get 70 of 120 amps of charging because I had to have the Weak AC tab set which seems to limit the maximum charge to about 2/3rds of maximum.


A bit of trawling on the forums came up with the suggestion that the voltage was the problem causing the Weak AC and if you look you can see the voltage is down to 216v on charge load.  A bit more reading and I discovered I could alter the voltage output of the generator using a tiny trimmer on the AVR.  So armed with jewellers screwdriver and the Victron software on the PC I turned the trimmer a fraction I do mean a tiny little amount and whoosh it went up to 270v.  Eventually I managed to tame it to 235v which was not easy on a running vibrating generator.

The result of the over voltage was:-
1 fried Sky satellite box
1 fried DAB radio
2 fried switch mode power supplies for phone charging

Note to self.  Unplug everything not needed when messing with voltage regulation!

Ho Hum!  The good news is the charger can now be run with the Weak AC de-selected and I now get a full 120amps of charge reducing of course as the battery voltage comes up.  When I have paid for the damaged items to be replaced I will be saving money on diesel and wear and tear on the generator as it now does in 4 hours what it previously took 12+.

I'm now in the process of installing some Cat5e cabling for some future CCTV ideas.  As regular readers might realise I have a habit for gadgets and CCTV and video streaming and time lapse, in fact anything.  The Cat5e will assist in developing this interest / project.

In the meantime I'm messing with live video streaming on this server.   Vaughn is a live streaming video community but the plan is to stream direct from the boat without using a 3rd party server.

Other things I meant to blog about but didn't.


A bug zapper.  I have to admit I bought it not expecting much.  IT'S BRILLIANT! this zaps flying and landed bugs, of which we get a lot of on the river in the summer.  Not only is it entertaining, it saves having the pollute the boat with nasty smelling bug spray.  On that, there is no way the moderen stuff  as good as it used to be.  Whatever did the job in the can before has been removed from the formula.  I suppose some more bloody EEC directives are to blame.

To save arguments as to who will get to play Zap The Bug I will buy another one next year so we have one each.

The other one is this.


In the shot you can see the light emitted which is pretty impressive and in the lens reflection you can see the LED's that make up the light. (Talented photography?)

It's a solar charged and only switches on when its dark and detects motion. Linky  I'm very pleased with it.

Sometimes you buy these things on a whim and they really exceed expectations.

Wednesday, 24 October 2012

More Step Work

I've been modifying the steps in the boat.  This came about at the front because the water level sender gauge needed recalibrating now its on the water.  Previously it was done when it was on dry land during the tank testing etc. It was necessary to remove the front steps to do this and a timely visit from Graham of Matilda Rose fame made the calibration easier as he called out the reading as I twiddled with the adjustment screw 45 feet away.

While I had the steps out I decided to make the top and bottom step liftable as well as the middle one which was already done.  Then it dawned on me that I could take the ply floor out under the steps and and have a cooler area to draw cool air from the bilge when its warm in the bedroom.  A quick temperature check revealed the base plate (black area) was 12.5 degrees while the inside of the room was 23 degrees.  I also changed the 5 micron primary water filter which was visibly quire grubby.  Next time the tank is empty I will move the main stop cock as removing the floor has made more room to position it in a better place right out of the tank.


Then it was on the the rear steps.  For ages now I have been intending to fit the rest of the of the tiny LED plinth lights. This has made such a difference to the appearance of the kitchen area and of course the steps.

Without Flash

With Flash

I am undecided about taking the floor out under the rear steps.  It would make a nice
pre- cooling area for beer and wine, but as the inverter is now under them this adds heat and makes the box area quite warm so I thinking this might be a source of condensation. 
I will consider it again one I have put some additional fans in the side of the steps to dump this heat out.

Tuesday, 9 October 2012

Book Shelves

All available space has to be used on a boat.  When fitted the kitchen I had 2 end units that had voids behind them. One each side of the boat.


Originally I was going to make a decor end infill, but the more I left it the more it became obvious these were destined to become book shelves.

So as usual a template was made each side.


This was used to make some end panels which I painted to match the side.


The addition of a shelf and a filler at the bottom completed the job.


And the same the other side. Accept this side has to be easily removable so the gas pipe and a joint can be inspected when the BSC is due.

So that's another job done.  I'm running out of things that need finishing, so as it was such a nice day today I decided to re-varnish the oak bow doors, and while I had the varnish out I also did the oak thresholds which had been left and the oak vents in the rear doors.


Friday, 5 October 2012

Front Locker Seats

Another of those jobs that's been hanging around is the fitting, or more precisely the securing of the bow lockers.

The lids have been loosely laid on top which looked fine but was not very safe if you stepped on them going forward as they would slip.  They were cut from templates I made then scanned into a CNC router by the same firm that did the rear decks. See here.  They also routed a bull nose so now the edges won't dig into the underside of our legs.


I have placed some wooden blocks on the under side that locate against the rim of the locker then to add some security I have set in a latch in each.


Not that anything of great value is kept in them, just I had 2 left over from doing the rear deck after changing the way I secured them down.